
 Back to index
Native Resolutions and Scaling
This is very old. Me and a few others have since written a fansubbing/encoding guide that also covers this topic in more depth and with more up-to-date information.
You can find it here.
There’s also this unfinished writeup, which is really just here for archival purposes.
Now go read one of those. This page has nothing of interest.
Table of contents
Avisynth and Vapoursynth basics
clip = core.fmtc.Resample(clip, 1920, 1080, kernel = 'bilinear')
clip.BilinearResize(1920, 1080)
Note that fmtc will use Spline36 to resize if no kernel is specified. Spline is generally the better choice, and we are only using bilinear as an example. To use Spline36 in Avisynth useclip.Spline36Resize(1920, 1080)
Using a debilinear resizer to reverse to a native resolution of 1280x720: (Note that you should never use this to upscale anything)clip = core.fmtc.Resample(clip, 1280, 720, kernel = 'bilinear', invks = True)
clip.Debilinear(1280, 720)
Debilinear for Avisynth can be found in the wiki. Traditional scaling is done by spreading all pixels of an image over a higher resolution(e.g. 960x540 ->
1920x1080), interpolating the missing pixels (in our example every other pixel on each axis), and in some
cases applying additional post-processing to the results.
For a less simplified explanation and comparison of different scaling methods refer to the Wikipedia article.
It is possible to invert the effects of this by using the according inverse algorithm to downscale the
image.
This is only possible if the exact resolution of the source material is known and the video has not
been altered after scaling it (we will deal with 1080p credits and text later).
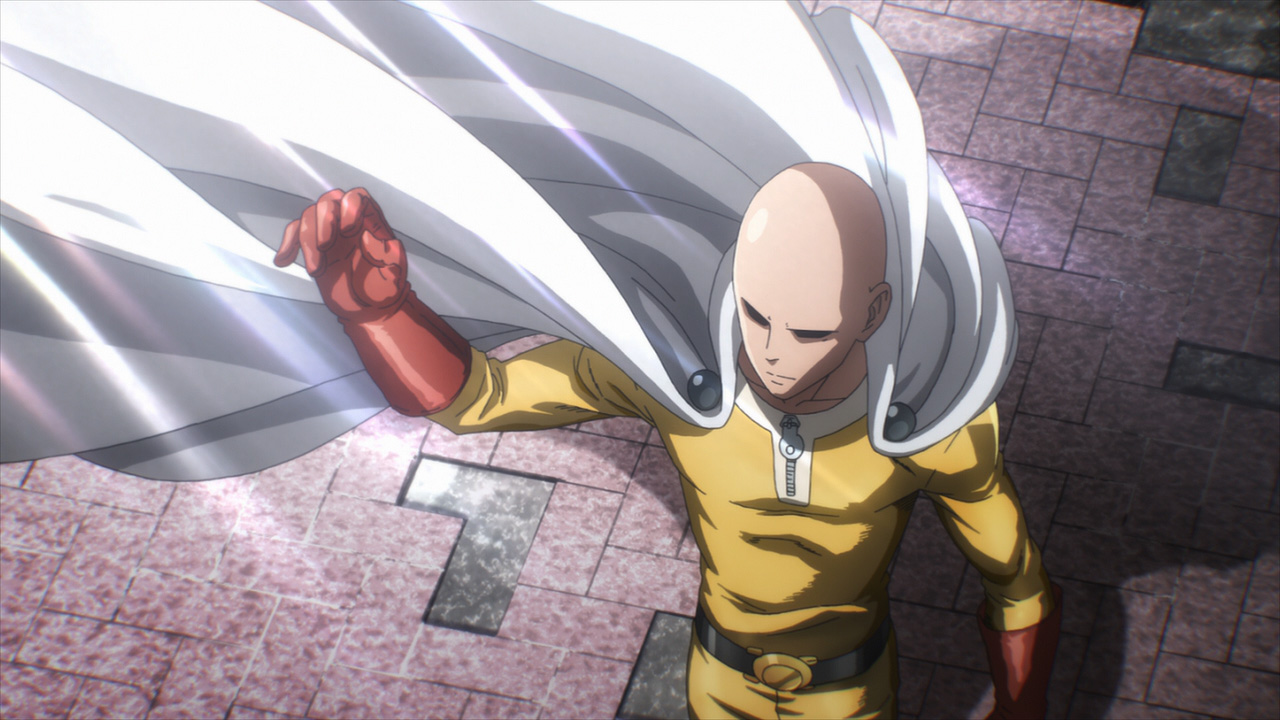
A few examples of scaled and inverse scaled images: (click for full resolution PNG)

1080p source frame from the One Punch man Blu-ray. No processing.
Source.Debilinear(1280, 720)
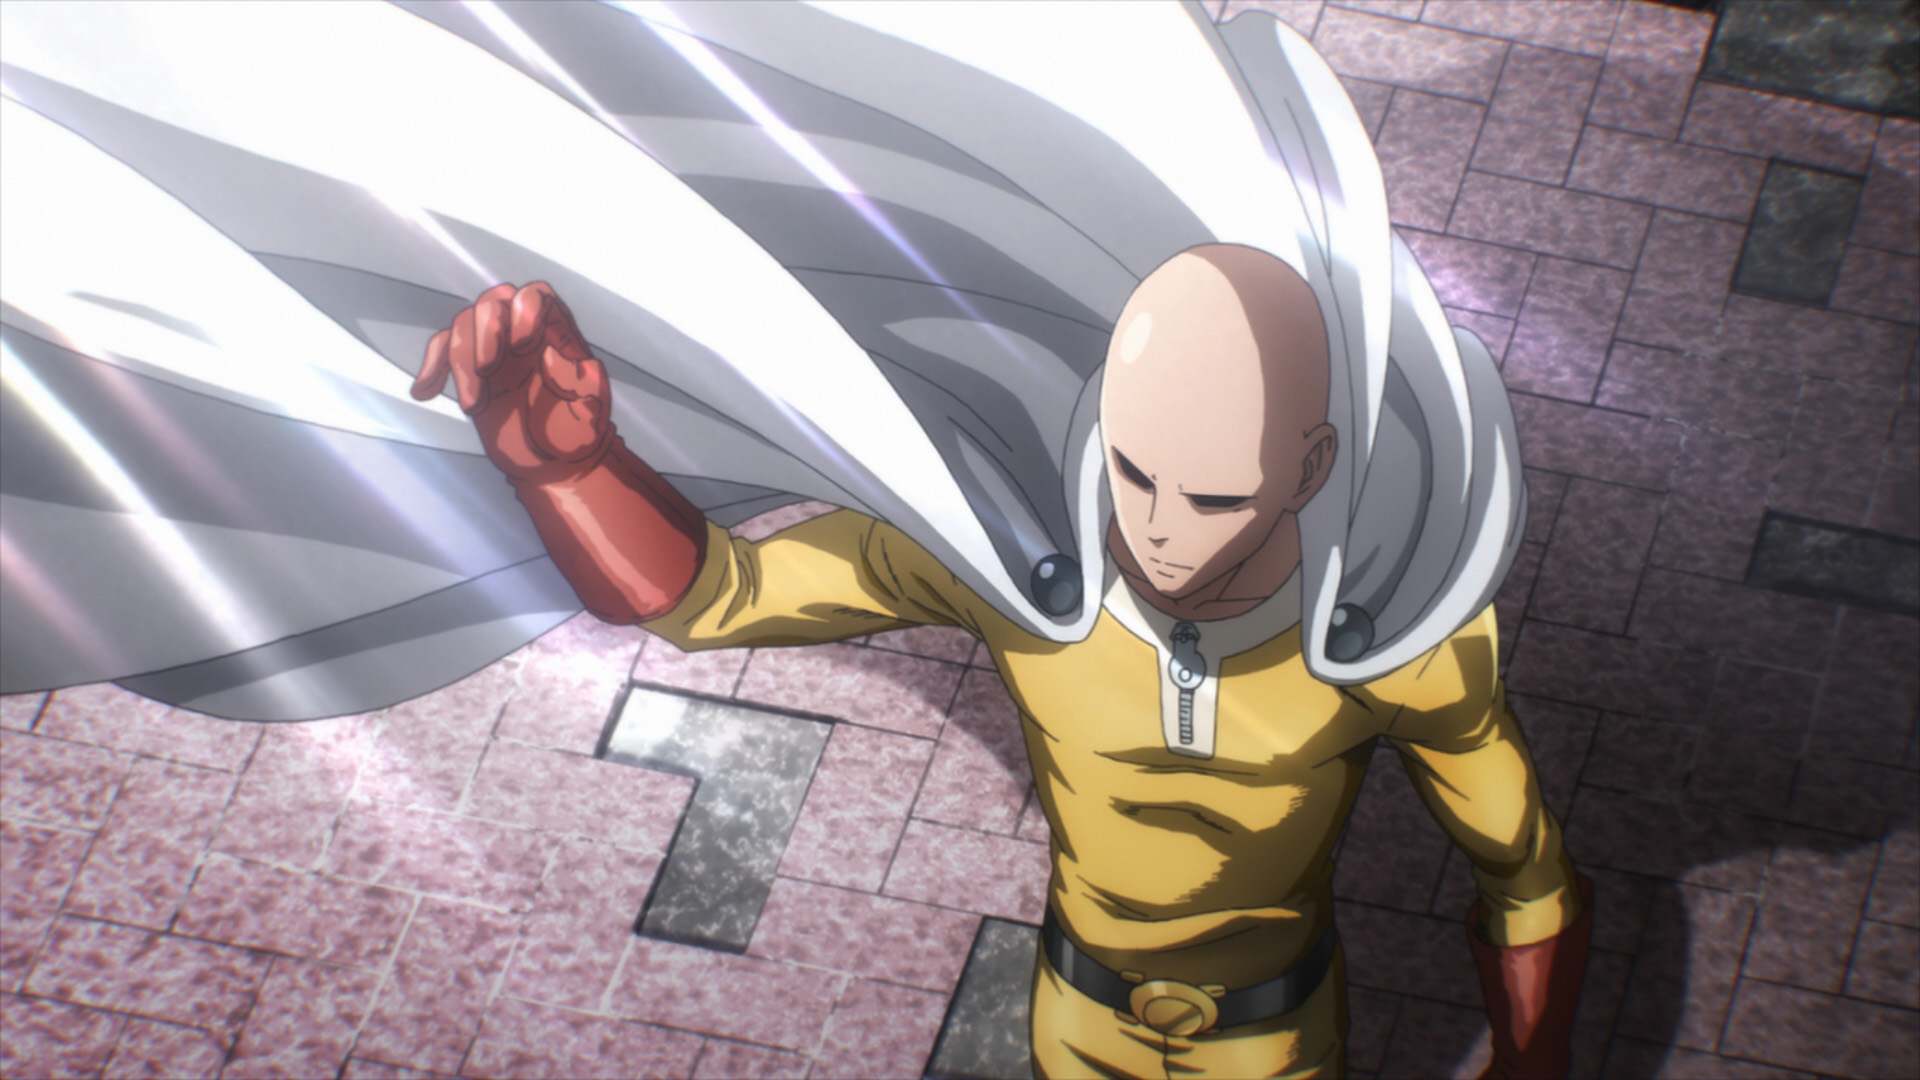
Source.Debilinear(1280, 720).BilinearResize(1920,1080)
This reverses the scaling and applies our own bilinear upscale.
You may see slight differences which are caused by the Blu-Ray
compression noise but without zooming in and if played in real time these images should be
indistinguishable.
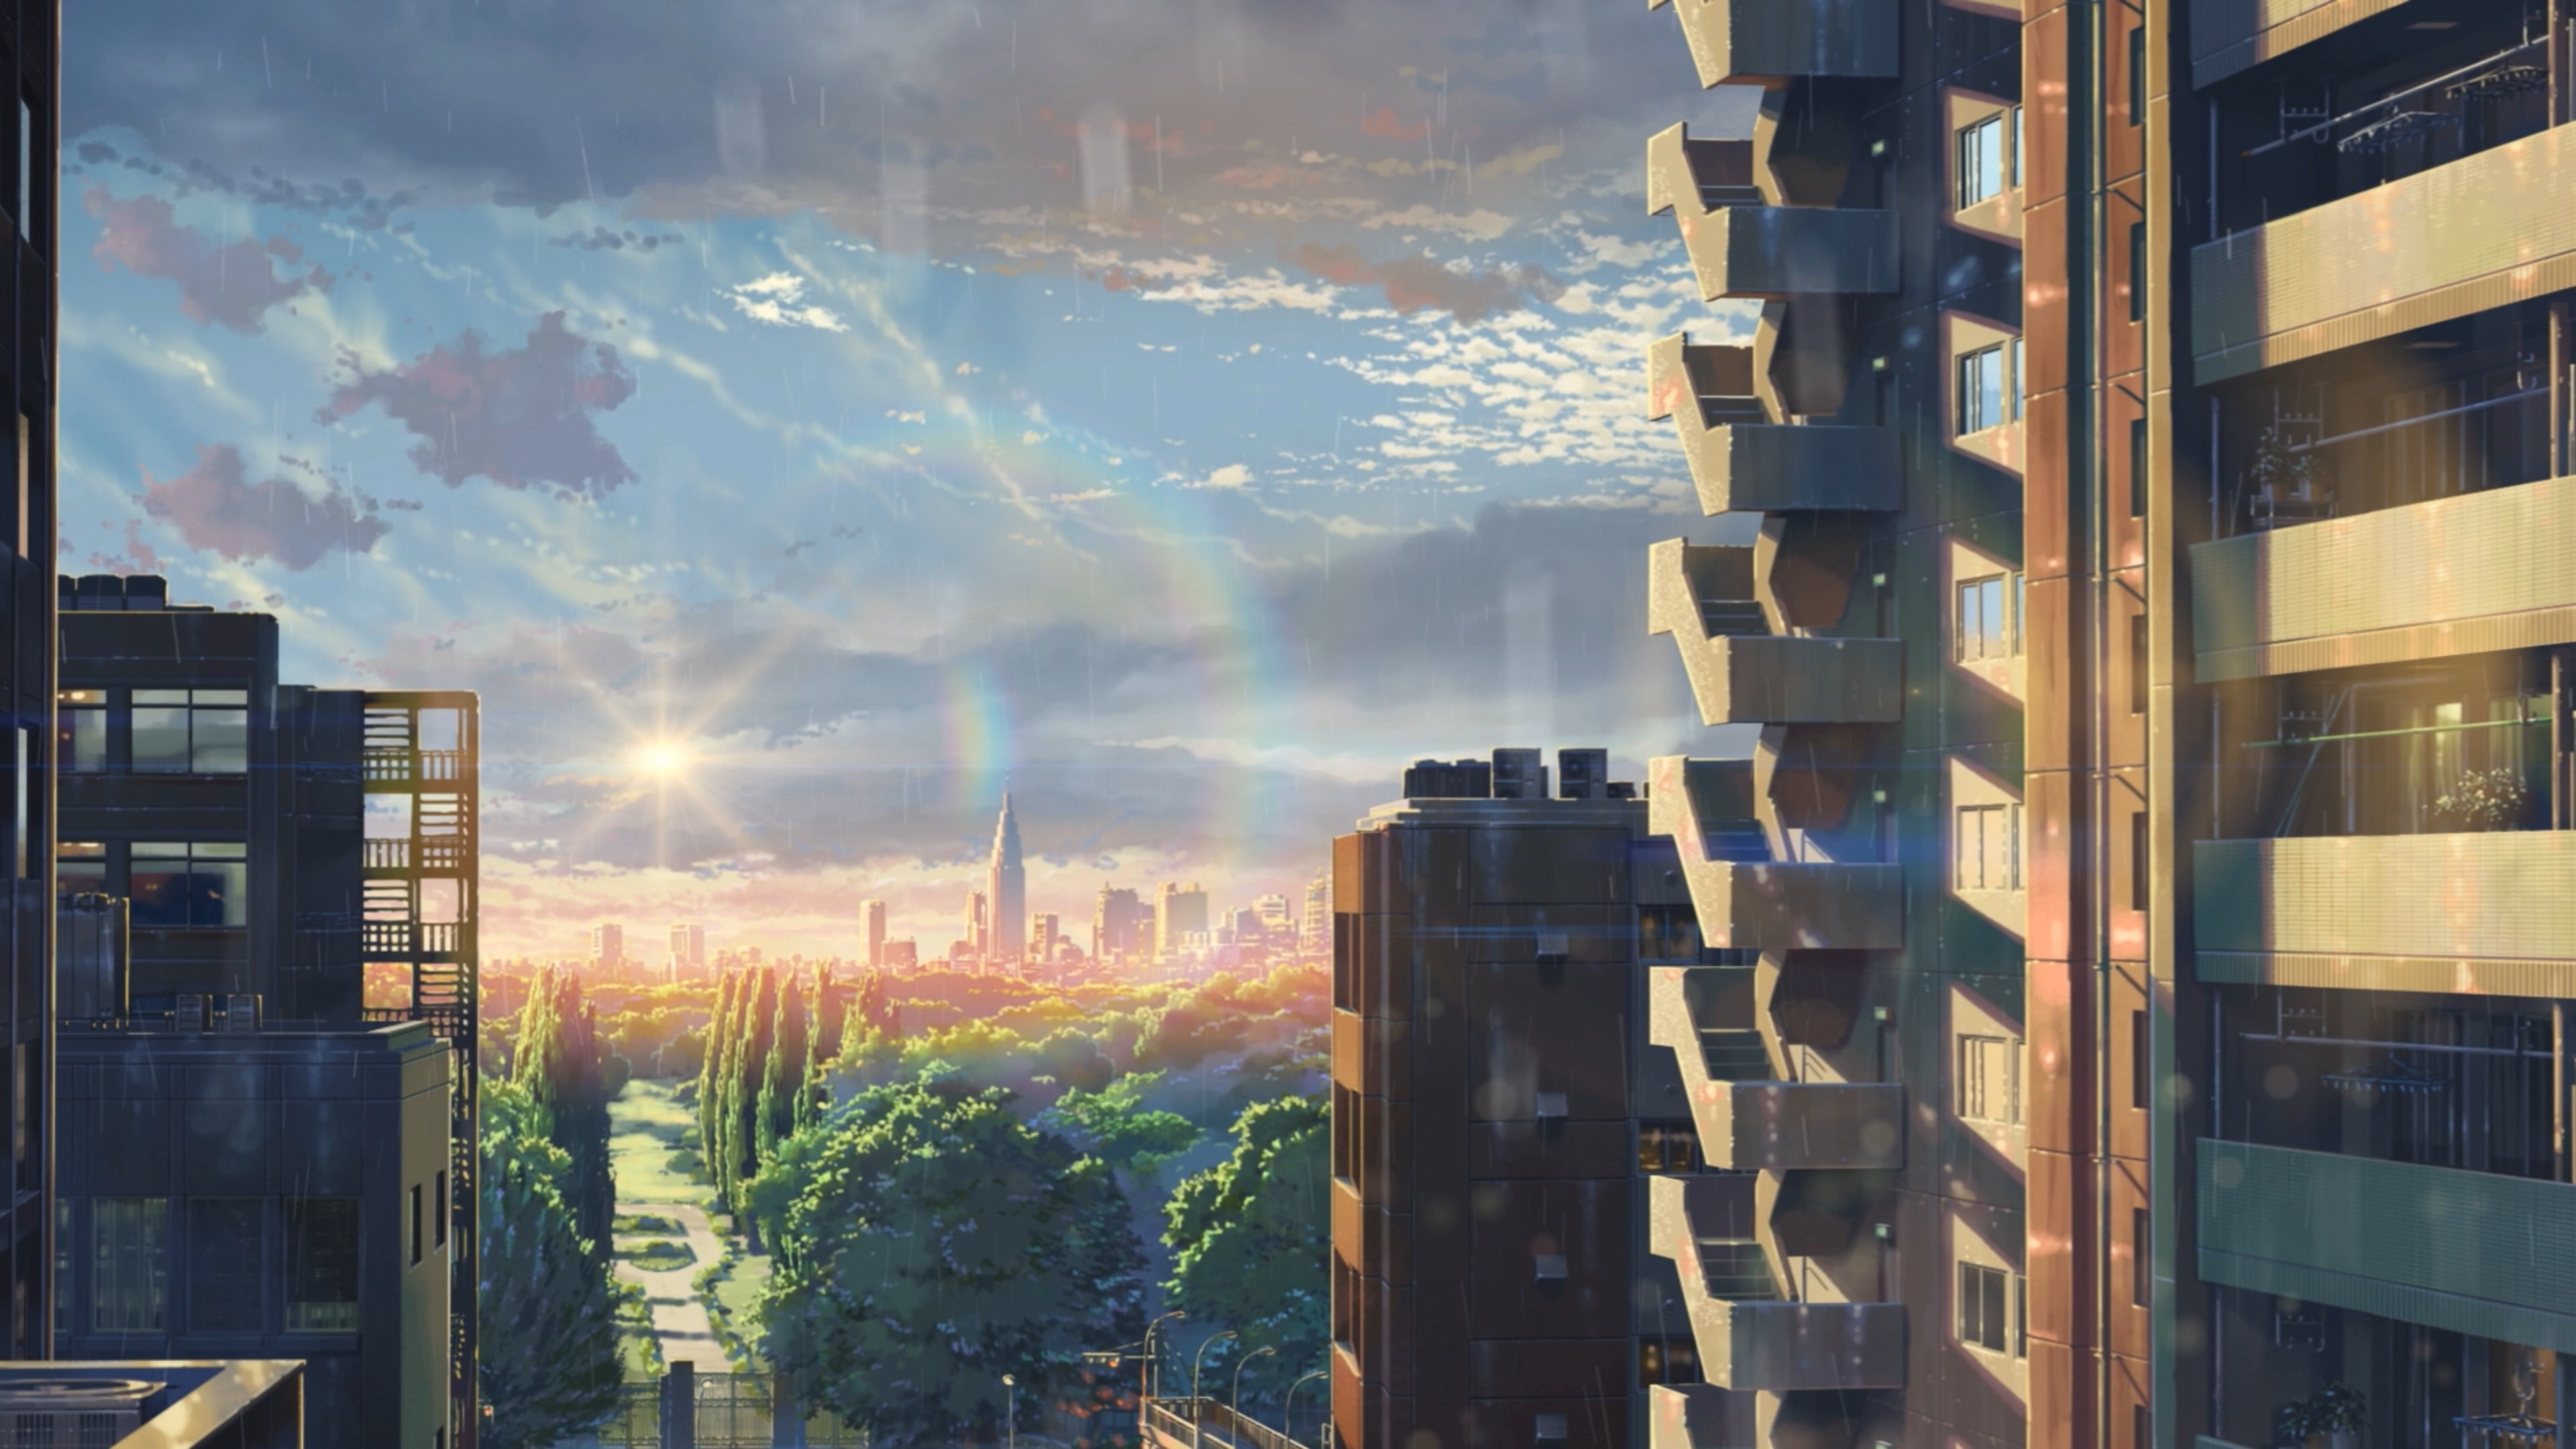
My second example will be a frame from Makoto Shinkai's Kotonoha no Niwa or "The Garden of Words". The movie
is not only beautifully drawn and animated but also produced at FullHD resolution. We will now upscale the
image to 4k using a bilinear resizer and reverse the scaling afterwards.

The untouched source frame
Source.BilinearResize(3840,2160)

Source.BilinearResize(3840,2160).Debilinear(1920,1080)
This time the images are even more similar, because no artifacts were added after upscaling.
As you can see, using inverse kernels to reverse scaling is quite effective and will usually restore the
original image accurately. This is desirable, as it allows the encoder to apply a reverse scaling algorithm
to release in 720p, significantly decreasing the release's filesize. The 720p video will be upscaled by the
leecher's video player, potentially using high quality scaling methods like the ones implemented in MadVR.
Releasing in native resolution will therefore not just save space, but may even improve the image quality on
the consumer's end.
 Source
 Source.Debilinear(1280, 720)
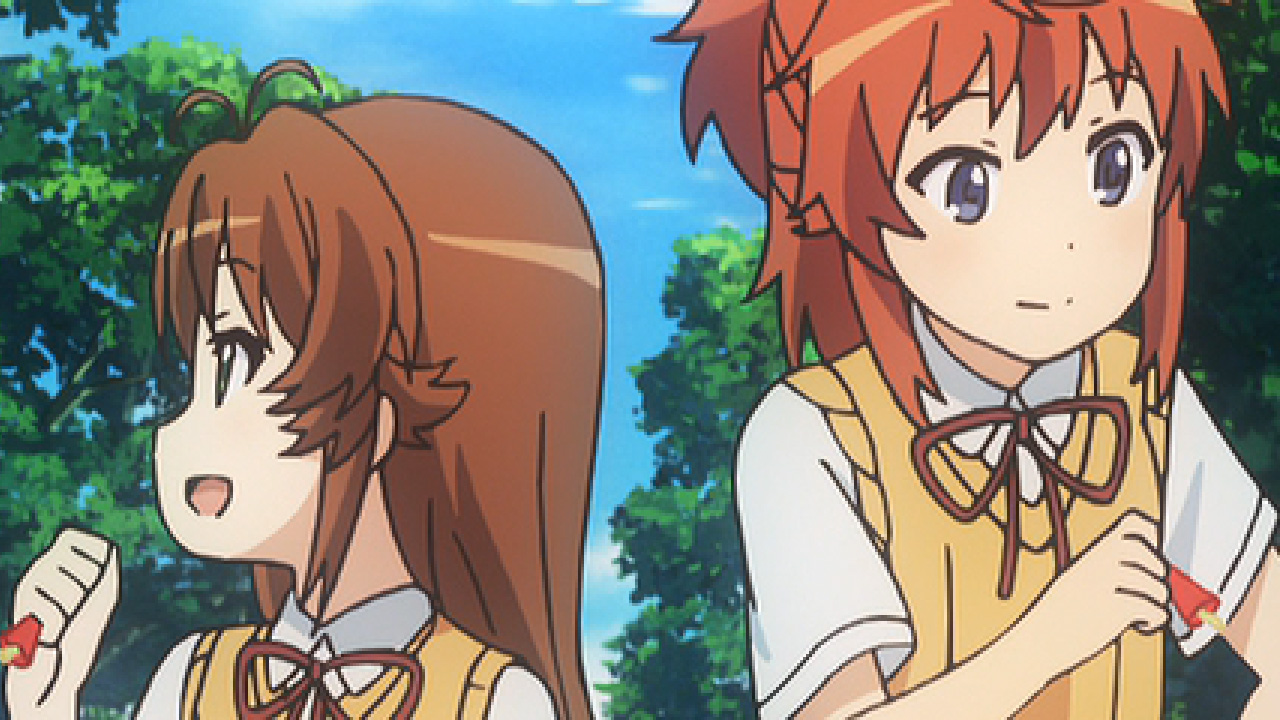 Source.Debilinear(1280, 720).PointResize(3840, 2160) and some cropping. Point resize (also called Nearest
Neighbor) is used to magnify without smoothing.
Source.Debilinear(1280, 720).PointResize(3840, 2160) and some cropping. Point resize (also called Nearest
Neighbor) is used to magnify without smoothing.
 Source.PointResize(3840, 2160) and cropping. As you can see this version does not have the ringing
artifacts.
Source.PointResize(3840, 2160) and cropping. As you can see this version does not have the ringing
artifacts. Unfortunately there are only few ways of determining the native resolution.
The main source is
anibin, a japanese blog that analyzes anime to find its native
resolution. In order to find an anime, you have to get the original title from MyAnimeList, AniSearch,
AniDB, or any other source that has Kanji/Kana titles.
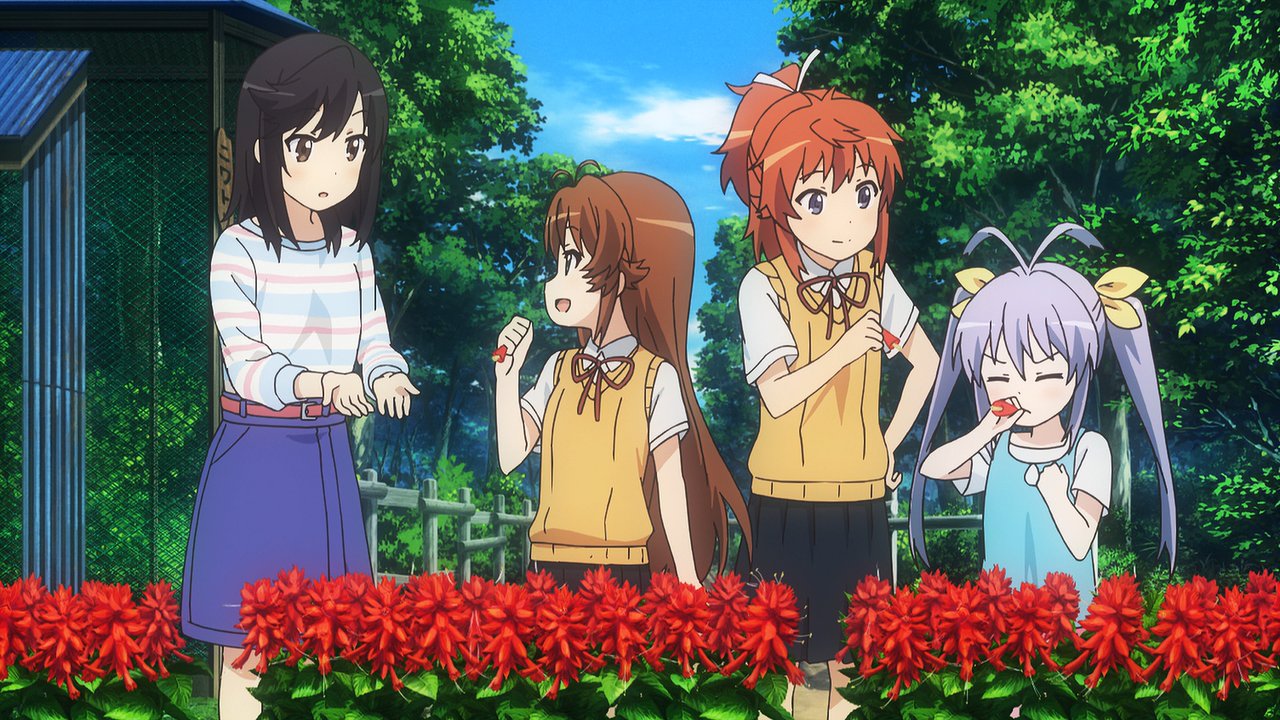
Non Non Biyori Repeat's japanese title is "のんのんびより りぴーと", and if you copy-paste it into the search bar on
anibin, you should be getting this result.
Even if you don't understand japanese, the numbers should speak for themselves. In this case the resolution
is 1504x846. This is above 720p but below 1080p, so you have multiple options. In this case I would
recommend encoding in 1080p or using a regular resizer (like Spline36) if you need a 720p version.
In some cases even scaling back to anibin's resolution does not get rid of the ringing, either because the
studio didn't use a bilinear resizer or the analysis was incorrect due to artifacts caused by TV
compression, so I wouldn't bother messing with the native resolution. It's not like you were gonna release
in 846p, right?
Edit: Apparently there are people out there who genuinely believe releasing a 873p video is a valid
option.
This is not wrong from an objective standpoint, but you should never forget that a majority of the leechers
does not understand encoding and is likely to ignore your release, because "Only an idiot would release in
8xxp".
If you want an easier way to detect ringing and scaling artifacts, read the chapter about artifacts and masks.
Btw, in case you do need (or want) to inverse scale our example, you would have to use a Debicubic resizer which leads me to our next topic.Sometimes you will encounter ringing and artifacts even if you are certain that you know the native resolution. This usually means that the studio used another resizer. Our example will be Byousoku 5 Centimeter or 5 Centimeters per Second (Anibin's Blu-Ray analysis)
This will be our test frame: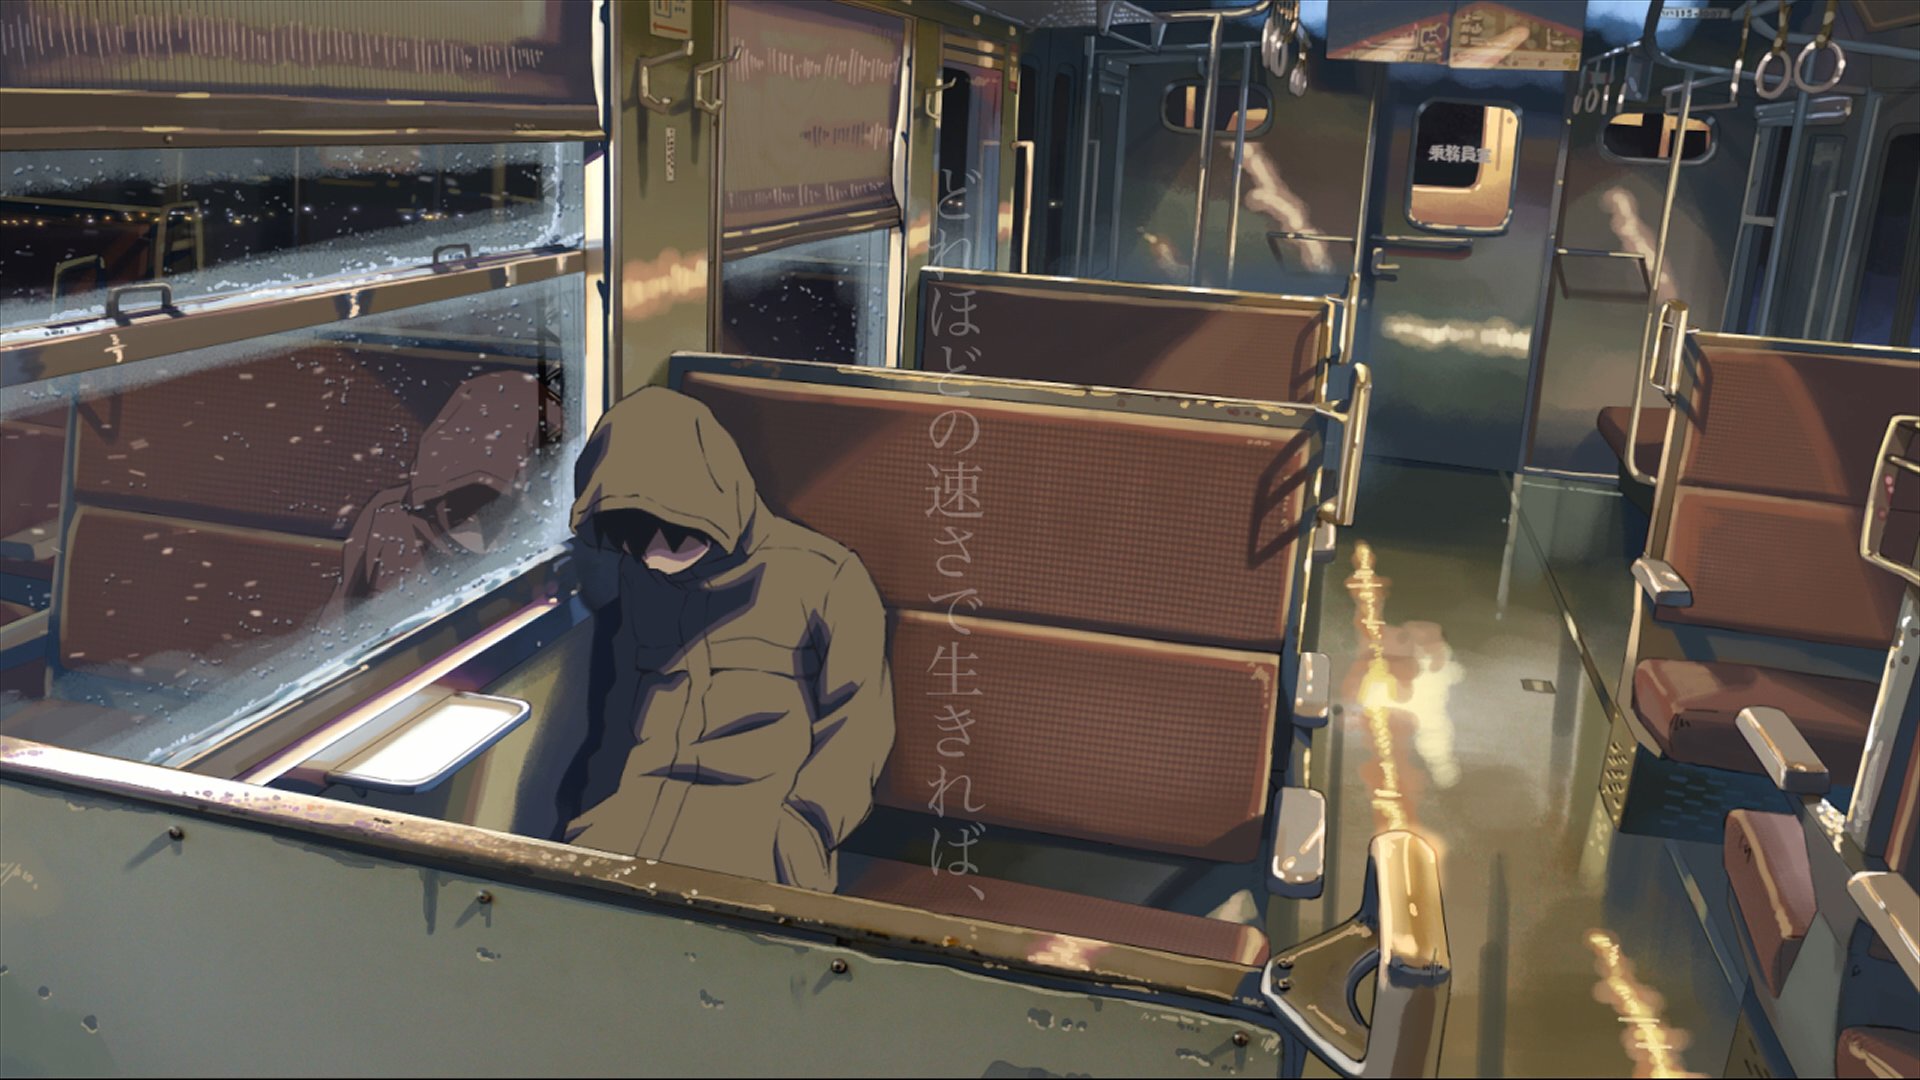 We will be using the masking functions explained in the next paragraph. For now just accept them as a good
way to find artifacts.
If we try to debilinearize our example, the mask will look like this:
We will be using the masking functions explained in the next paragraph. For now just accept them as a good
way to find artifacts.
If we try to debilinearize our example, the mask will look like this:
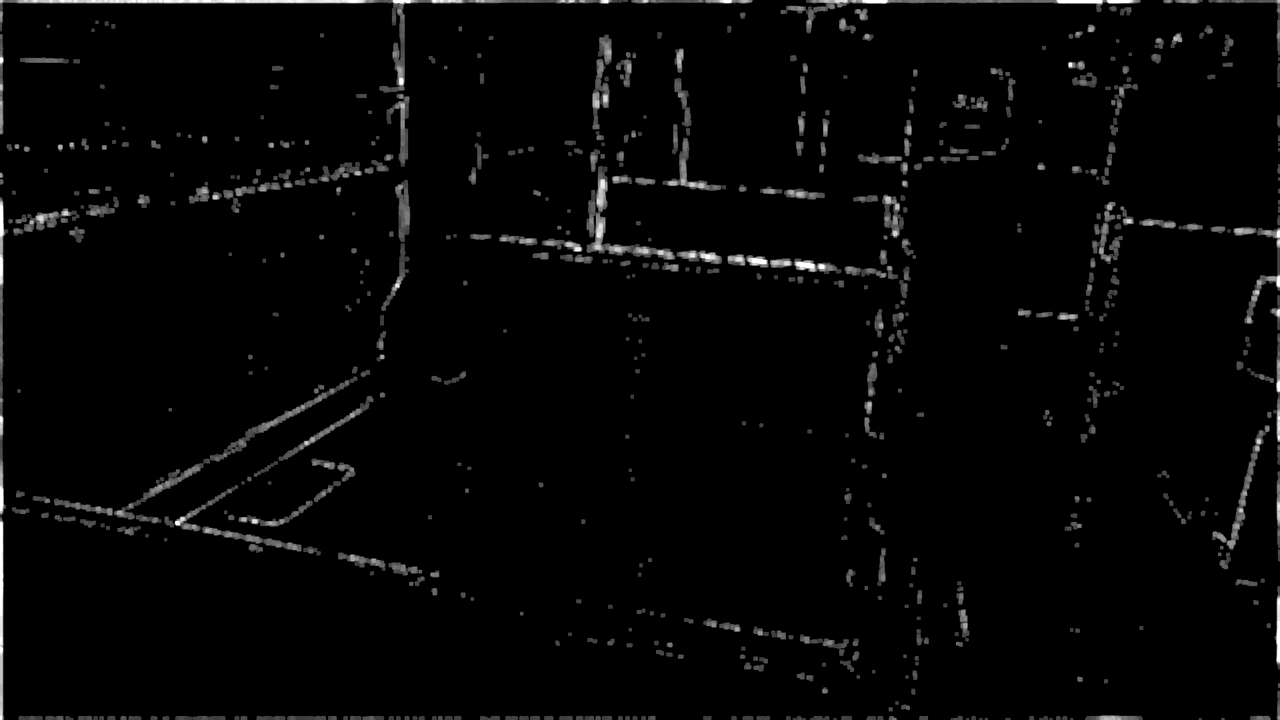 Despite using the correct resolution we can see strong artifacts around all edges. This can have multiple,
not mutually exclusive reasons:
Despite using the correct resolution we can see strong artifacts around all edges. This can have multiple,
not mutually exclusive reasons:
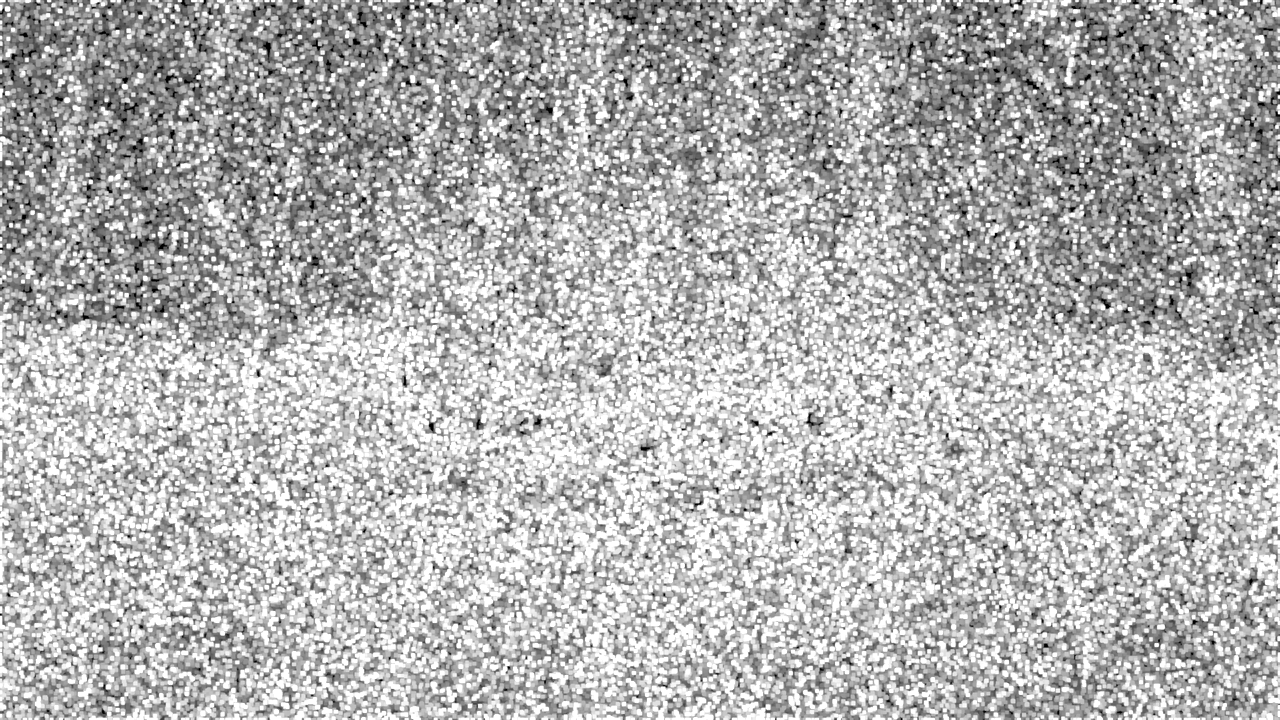
 And now the mask:
 In this case you would have to trim the scene and use a regular resizer. Sometimes all backgrounds were drawn in
a higher or lower resolution than the characters and foreground objects. In this case inverse scaling becomes
very difficuilt since you would need to know the resolution of all different planes and you need a way to mask
and merge them. I'd advise using a regular resizer for these sources or just releasing in 1080p.
In this case you would have to trim the scene and use a regular resizer. Sometimes all backgrounds were drawn in
a higher or lower resolution than the characters and foreground objects. In this case inverse scaling becomes
very difficuilt since you would need to know the resolution of all different planes and you need a way to mask
and merge them. I'd advise using a regular resizer for these sources or just releasing in 1080p.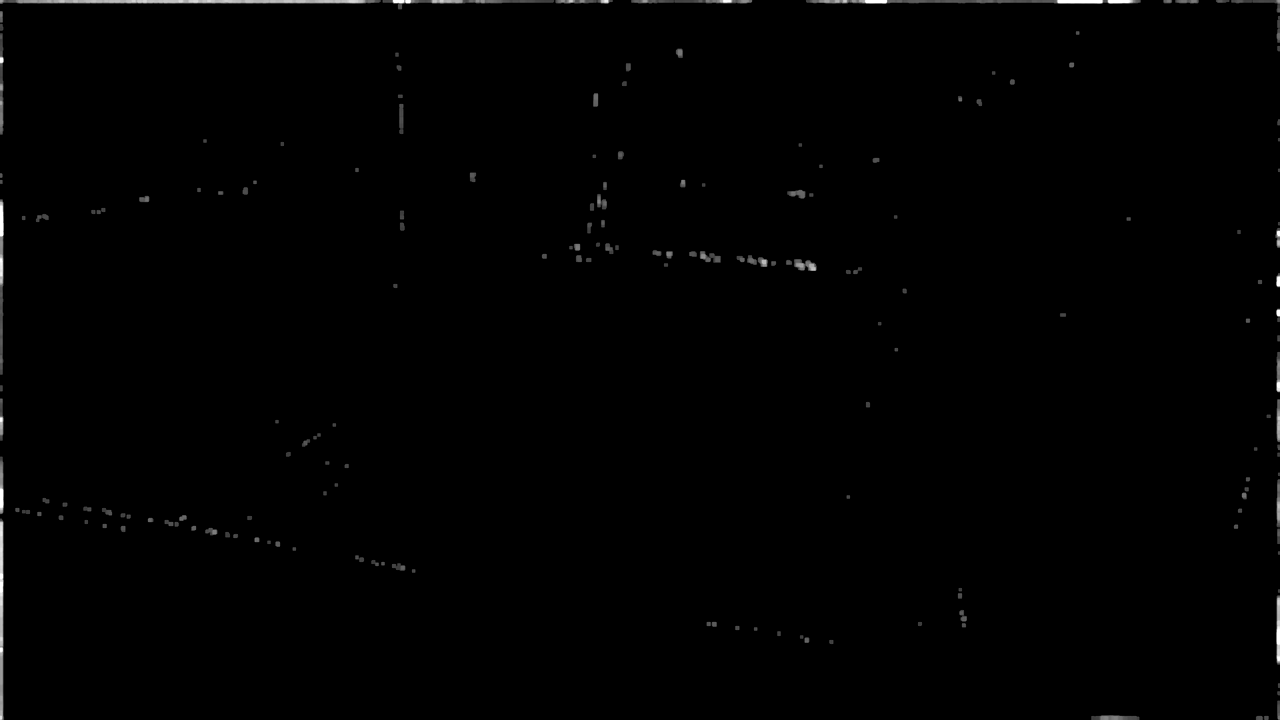 The remaining artifacts are likely caused by compression artifacts on the Blu-Ray as well as potential
postprocessing in the studio. This brings us back to reason 1, although in this case the artifacts are weak
enough to let the mask handle them and use debicubic for the rest.
The remaining artifacts are likely caused by compression artifacts on the Blu-Ray as well as potential
postprocessing in the studio. This brings us back to reason 1, although in this case the artifacts are weak
enough to let the mask handle them and use debicubic for the rest.src.Debicubic(1280, 720, b=0, c=1)
For Vapoursynth use fmtconv:out = core.fmtc.resample(src, 1280, 720, kernel = 'bicubic', invks = True, a1 = 0, a2 = 1)
To use a mask for overlays and potential artifacts as well as 4:4:4 output use the Vapoursynth function linked at the bottom. Example for bicubic upscales:out = deb.debilinearM(src, 1280, 720, kernel = 'bicubic')
If the b and c parameters are not 0 and 1 (which should rarely be the case) you can set them as a1 and a2 like in fmtc.resample(). Bicubic's own default is 1/3 for both values so if bilinear and bicubic 0:1 don't work you could give that a try.Masks: Dealing with artifacts and 1080p overlays
 In order to avoid this you will have to mask these parts with conventionally downscaled pixels.
The theory behind inverse scaling is that it can be reversed by using regular scaling, so (in theory) a
source frame from a bilinear upscale would be identical to the output of this script:
In order to avoid this you will have to mask these parts with conventionally downscaled pixels.
The theory behind inverse scaling is that it can be reversed by using regular scaling, so (in theory) a
source frame from a bilinear upscale would be identical to the output of this script:
source.Debilinear(1280,720).BilinearResize(1920,1080)
This property is used by scripts to mask native 1080p content by finding the differences between the source and the above script's output. A mask would look like this: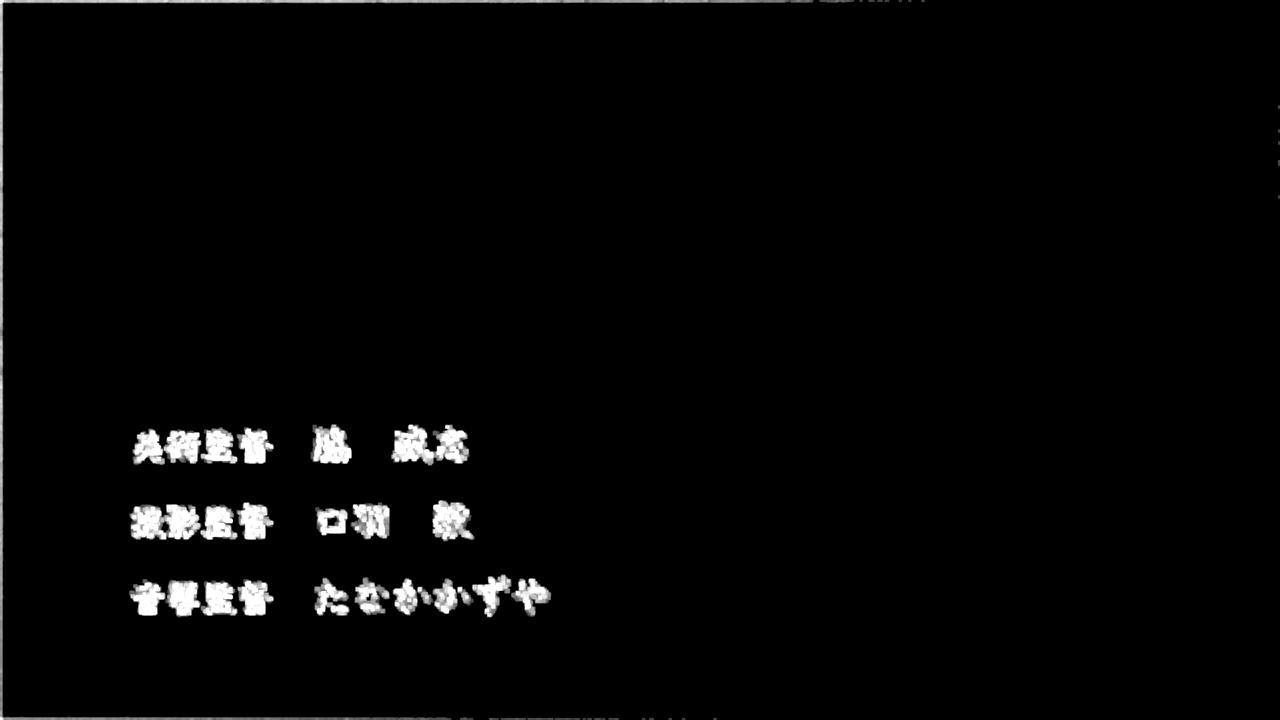 If there are any differences, the areas with artifacts will be covered by a regular downscale like
source.Spline36Resize(1280,720)
In Avisynth you can import DebilinearM which can also be found in the wiki. For Vapoursynth MaskDetail can be used to create the Mask and MaskedMerge to mask the artifacts. A full importable script is available at the end.
#MaskDetail has to be imported or copied into the script
#src is the source clip
deb = core.fmtc.resample(src, 1280, 720, kernel = 'bilinear', invks = True)
noalias = core.fmtc.resample(src, 1280, 720, kernel="blackmanminlobe", taps=5)
mask = maskDetail(src, 1280, 720, kernel = 'bilinear')
masked = core.std.MaskedMerge(noalias, src, core.std.Invert(mask, 0))
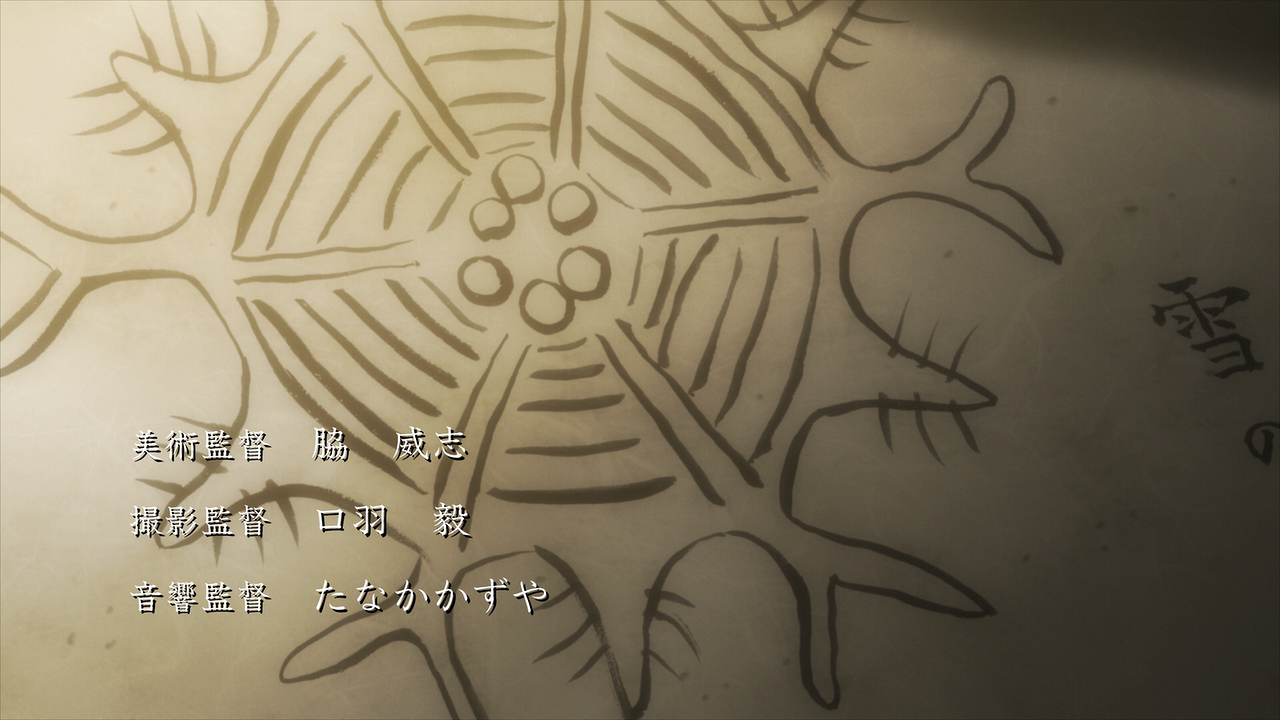
 The credits stand out less and don't look oversharpened. The effect can be much stronger depending on the
nature and style of the credits.
The credits stand out less and don't look oversharpened. The effect can be much stronger depending on the
nature and style of the credits.
y = core.std.ShufflePlanes(src, 0, colorfamily=vs.GRAY)
u = core.std.ShufflePlanes(src, 1, colorfamily=vs.GRAY)
v = core.std.ShufflePlanes(src, 2, colorfamily=vs.GRAY)
y = core.fmtc.resample(y, 1280, 720, kernel = 'bilinear', invks = True)
u = core.fmtc.resample(u, 1280, 720, kernel = "spline36", sx = 0.25)
v = core.fmtc.resample(v, 1280, 720, kernel = "spline36", sx = 0.25)
out = core.std.ShufflePlanes(clips=[y, u, v], planes = [0,0,0], colorfamily=vs.YUV)
noalias = core.fmtc.resample(src, 1280, 720, css = '444', kernel="blackmanminlobe", taps=5)
mask = maskDetail(src, 1280, 720, kernel = 'bilinear')
out = core.std.MaskedMerge(noalias, out, core.std.Invert(mask, 0))
out.set_output()
import vapoursynth as vs
import debilinearm as deb
core = vs.get_core()
src = core.lsmas.LWLibavSource(r'E:\path\to\source.m2ts') #other source filters will work too
out = deb.debilinearM(src, width, height, kernel)
out = deb.debilinearM(src)
List of parameters and explanation:| parameter | [type, default] | explanation |
| src | [clip] | the source clip |
| w | [int, 1280] | target width |
| h | [int, 720] | target height |
| kernel | [string, 'bilinear'] | kernel used for inverse scaling. Has to be in 'quotes' |
| taps | [int, 4] | number of taps for reverse scaling |
| return_mask | [boolean, False] | returns artifact mask in grayscale if True |
| a1 | [int, 0] | b parameter of bicubic upscale, ignored if kernel != 'bicubic' |
| a2 | [int, 1] | c parameter of bicubic upscale, ignored if kernel != 'bicubic' |
Edit: The generic functions (core.generic.*) were removed in vapoursynth in R33, as most of them are now part of the standard package (core.std.*). I have updated the script below accordingly, meaning it may not work with R32 or older. This also applies to MonoS' MaskDetail which (as of now) has not been updated. You can "fix" it by replacing both occurences of "core.generic" with "core.std".
The most recent version of my scripts can always be found on Github:
Download
Download fmtconv (necessary)